Brake Fluid Change and Bleeding Your Brakes
Quick Answer
Most manufacturers ask for a brake fluid change every two years or around 30,000 miles, whichever comes first, and your owner's manual is the final word. Brake fluid absorbs moisture straight out of the air, which lowers its boiling point and rusts the metal inside your calipers and ABS unit. A full change means pushing every drop of old fluid out through the bleeder screw at each wheel, usually starting at the wheel furthest from the master cylinder. Budget one to two hours, roughly $20 to $60 in fluid and a bleeder kit, against $90 to $200 at a shop.
The Cheapest Safety Job You Are Probably Skipping
Nobody forgets brake pads. You hear them, you feel them, and eventually the car tells you in a voice you cannot ignore. Brake fluid is the opposite. It sits in a small plastic reservoir doing the single most important job in the car, and it degrades in total silence.
Here is the thing that catches most owners out. Brake fluid is hygroscopic, which is a long word for thirsty. It pulls water vapour out of the air through the rubber hoses and the reservoir cap, year after year, whether the car is driven daily or parked in a garage. Water lowers the boiling point, and hot brakes turn that water into vapour. Vapour compresses. Fluid does not. That is the moment a firm pedal turns into a pedal that sinks to the floor.
The good news is that changing it is one of the easiest jobs in this guide's whole category. If you can remove a wheel and turn a small wrench, you can do this in an afternoon.
Tools and Fluid You Will Need
Two sealed bottles, a bleeder kit, and a flare nut wrench cover the whole job. Prices vary by country and seller.
fluid
DOT 4 Brake Fluid (Bosch / Prestone / ATE)
Sealed bottles only. Buy two for a full flush on most cars.
Check pricetool
One Person Brake Bleeder Kit (Vacuum / Check Valve)
Bleed all four corners solo. No helper on the pedal required.
Check pricetool
Flare Nut / Brake Line Wrench Set
Six point grip that will not round off a stubborn bleeder screw.
Check priceAffiliate links. We may earn a small commission at no extra cost to you. Learn more.
Your brakes work because liquid does not squash. Press the pedal and the master cylinder pushes fluid down steel lines to each caliper, which squeezes the pads against the disc. Every part of that chain is solid or liquid, so the force at your foot arrives at the wheel almost instantly.
Add water to that fluid and you break the rule. Under heavy braking the fluid near the caliper can pass 250 degrees Fahrenheit easily, and any absorbed water turns to vapour. Vapour compresses beautifully, which is exactly what you do not want. The pedal travels further, the brakes bite later, and in the worst case the pedal goes to the floor at the bottom of a long hill.
Fresh fluid from a sealed bottle boils somewhere around 400 to 500 degrees Fahrenheit. Fluid with three percent absorbed water can lose a hundred degrees or more of that margin. You cannot see it happening, which is why the calendar matters more than how the brakes feel.
Signs Your Brake Fluid Is Past It
Old fluid rarely announces itself with a warning light. These are the clues worth paying attention to.
A spongy or sinking pedal
Hold steady pressure at a red light. The pedal should stay put. If it creeps slowly towards the floor, you have either air, moisture, or a failing master cylinder.
Dark fluid in the reservoir
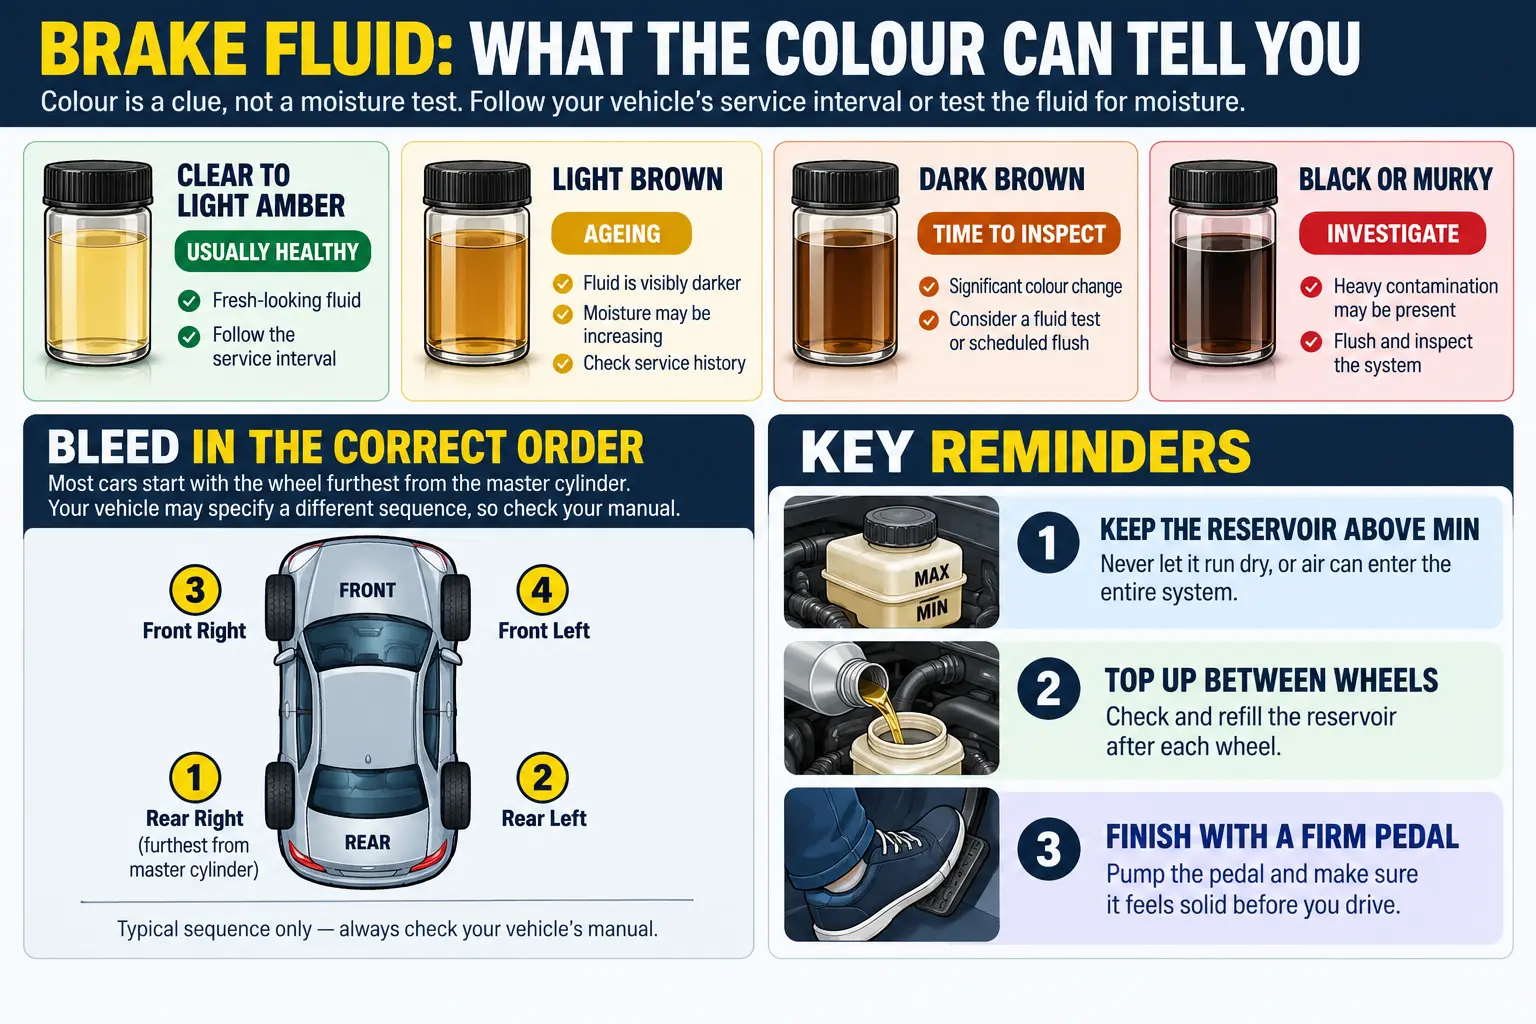
Wipe the outside of the reservoir clean and look at the colour against a white background. Anything darker than weak tea is telling you the fluid has been in there too long.
Brake fade on long descents
Brakes that feel strong at first and then gradually give up on a mountain road are the classic signature of fluid that is boiling. This one is genuinely dangerous.
Longer stopping distances
If the pads and rotors are healthy but the car takes noticeably longer to pull up, the hydraulics deserve a look. Our brake pad replacement guide covers ruling out the friction side first.
The brake warning light
A brake light that comes on and goes off around corners usually means a low level, which points at worn pads or a leak. Find the cause before you top up and forget about it.
DOT 3, DOT 4, DOT 5.1 and the One to Avoid
Look at the cap on your reservoir. It will say DOT 3, DOT 4, or DOT 5.1, and that rating is a federal standard describing the minimum boiling points the fluid must meet. The National Highway Traffic Safety Administration sets those specifications, which is why a bottle bought anywhere in the United States works to the same rules.
DOT 3
Glycol based, the most common fluid in older domestic cars. Dry boiling point around 401 degrees Fahrenheit. Cheap and perfectly fine for normal driving.
DOT 4
Glycol based with a higher dry boiling point, around 446 degrees Fahrenheit. Standard on most modern cars, anything with ABS and stability control, and anything European.
DOT 5.1
Still glycol based despite the confusing name, with the highest boiling point of the three at roughly 500 degrees Fahrenheit. Used on performance cars and heavy tow vehicles.
DOT 5 (the odd one)
Silicone based, does not absorb water, and must never be mixed with any of the above. It is for classics and show cars with systems built for it. Putting it in a normal car ruins the seals and the ABS unit.
The simple rule is that you can move up but never down. DOT 4 in a car that asks for DOT 3 is fine. DOT 3 in a car that asks for DOT 4 is not. If you want the wider picture on every liquid in the car, our complete car fluids guide covers them all.
NEVER USE AN OPENED BOTTLE
A bottle of brake fluid that has been sitting open in the garage since the last job has been absorbing moisture the entire time. It may already be worse than what is in your car. Buy two fresh sealed bottles, use what you need, and throw away the rest. Brake fluid also strips paint on contact, so keep a bottle of water nearby and rinse any spill on bodywork immediately rather than wiping it.
How to Change Brake Fluid: Step by Step
Set aside one to two hours for your first attempt. Have everything laid out before you start, because once the reservoir is low you do not want to be hunting for a wrench.
Confirm the Fluid Type and Buy Sealed Bottles
Read the reservoir cap and the owner's manual. Buy two sealed bottles of the correct DOT rating, which is plenty for a full flush on most cars. While you are at it, note the bleeder screw size, usually 8mm, 10mm, or 11mm, so you take the right wrench out with you.
Lift the Car and Remove the Wheels
Break the lug nuts loose while the wheels are still on the ground. Lift at the manufacturer's jack points and lower onto jack stands, then chock any wheel still on the ground. Working on all four corners at once is easiest, but one corner at a time works if you only own two stands. Our floor jacks and jack stands guide covers choosing gear that will not let you down.
Suck the Old Fluid Out of the Reservoir
Wipe around the cap first so grit does not fall in. Draw the old fluid out with a turkey baster or fluid syringe until only a shallow layer is left, then refill to the maximum line with fresh fluid. Skipping this step is not fatal, it just means you push far more old fluid through the lines and burn through an extra bottle.
Start at the Wheel Furthest From the Master Cylinder
On most cars that means the rear passenger side first, then rear driver side, then front passenger side, then front driver side. Some vehicles, particularly those with a diagonally split system, use a different sequence, so check the manual. Slip a clear hose over the bleeder screw and run it into a bottle with a little fresh fluid in the bottom, keeping the hose end submerged so air cannot be drawn back in.
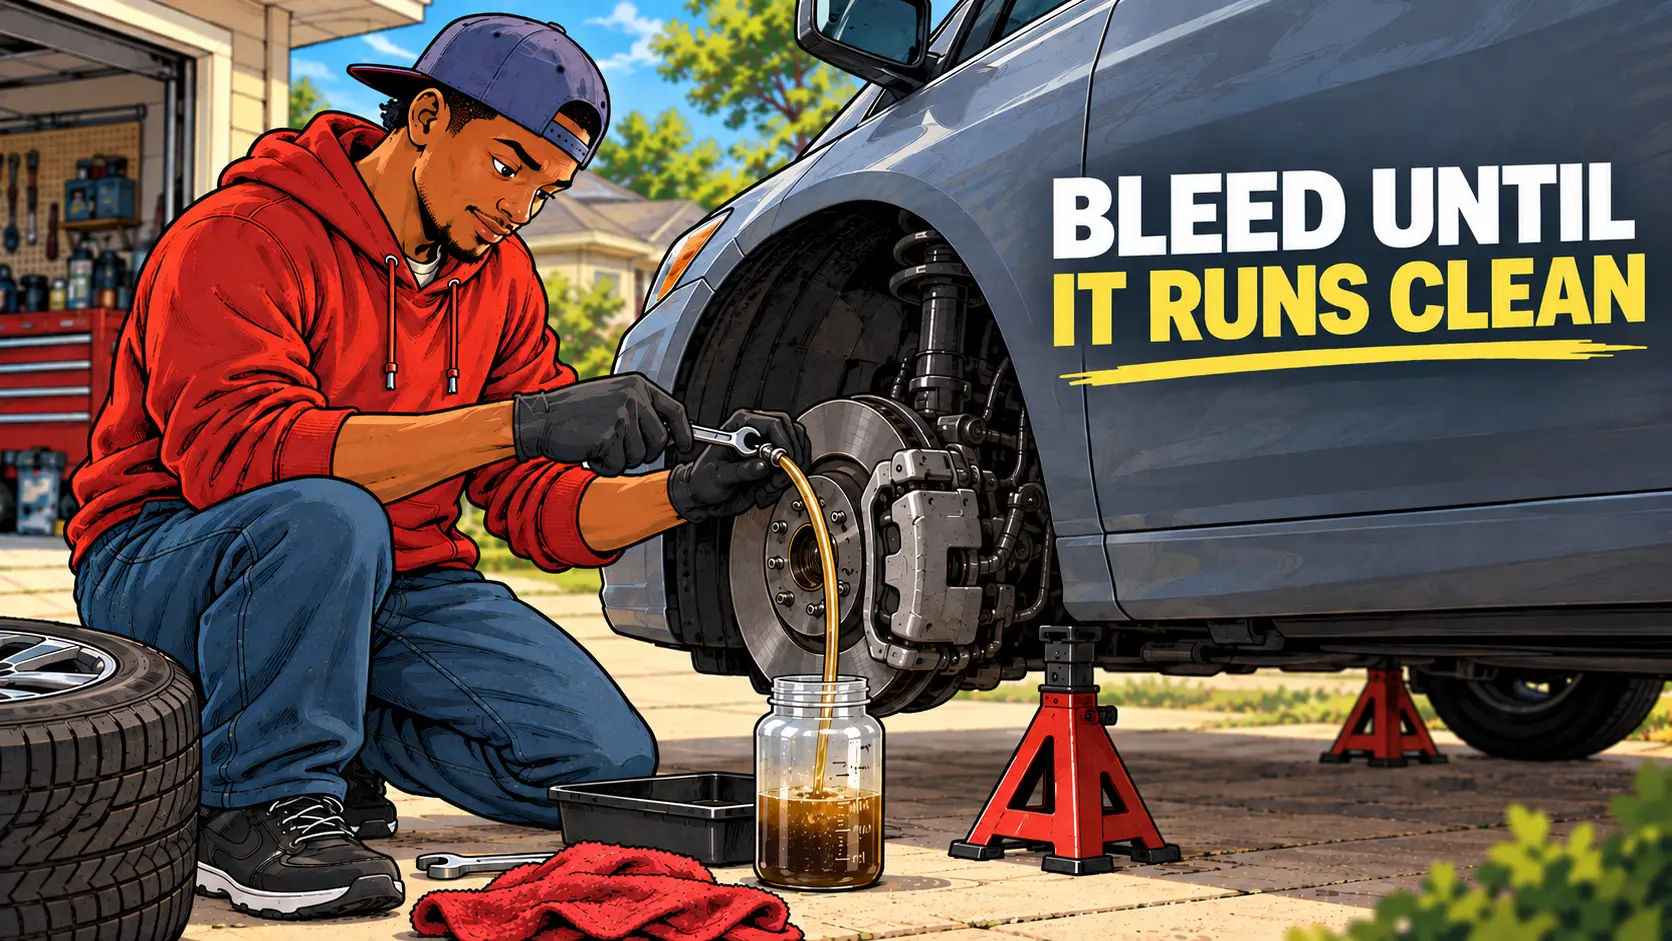
Bleed Until the Fluid Runs Clean
With a helper, the rhythm is pedal down and held, crack the bleeder a quarter turn, let fluid out, close the bleeder, then pedal released. Closing before they lift their foot is the part everyone gets wrong, and it is how air gets sucked back in. Repeat at each wheel until the fluid coming out is the colour of the fresh fluid going in, with no bubbles.
Top Up After Every Single Wheel
Check the reservoir every few pedal strokes and never let it drop below the minimum line. If it runs dry, air travels into the master cylinder and the ABS module, and clearing that often needs a scan tool that can cycle the ABS pump. This one habit is the difference between an easy job and a tow truck.
Torque Everything and Test the Pedal
Snug the bleeder screws, refit the wheels and torque the lug nuts to the figure in your manual, usually between 80 and 100 pound feet, in a star pattern. A decent torque wrench earns its keep here. Top the reservoir to maximum, pump the pedal until firm, then check every bleeder for weeping before you move the car.
Why the Bleed Order Matters
Air rises and takes the path of least resistance. Bleeding the longest line first means each subsequent wheel pushes fluid through a shorter run, so you clear the system without chasing bubbles back and forth. Start at the front and you can easily push air backwards into a line you have already finished.
The standard sequence on a left hand drive car with a conventional front to rear split is rear right, rear left, front right, front left. Cars with a diagonally split system, common on many front wheel drive models, sometimes specify a different order. Two minutes with the manual saves an hour of frustration.
Three Ways to Bleed, and Which to Choose
Two person pedal bleeding, $0 extra
The traditional method, and free if you can bribe someone with coffee. It works perfectly as long as the bleeder is closed before the pedal comes back up every single time. Agree on clear verbal cues before you start, because you will not see each other.
One person vacuum or check valve kit, $25 to $50
A hand pump pulls fluid out of the bleeder, or a one way valve in the hose lets fluid out and stops it flowing back. Either way you work alone at your own pace. This is the sweet spot for most home mechanics.
Pressure bleeder, $60 to $200
Pressurises the reservoir so fluid flows steadily the moment you open a bleeder. Fastest, cleanest, and the least likely to introduce air. Worth it if you have more than one car or you enjoy this sort of thing.
CARS WITH ABS NEED A LITTLE MORE CARE
A routine fluid change on a healthy ABS car is no different from any other car, as long as the reservoir never runs dry. The complication only appears when air has already reached the ABS module, for example after a hydraulic repair or a reservoir that emptied. Clearing that usually requires a bidirectional scan tool to cycle the pump and valves while bleeding. If your pedal stays soft after two careful bleeds, that is the likely reason.
When Things Do Not Go to Plan
- The bleeder screw will not budge: soak it in penetrating oil for fifteen minutes, use a six point flare nut wrench rather than an open ended one, and apply steady pressure. Heat from a torch is a last resort and never near a rubber hose.
- The bleeder screw snapped: stop. A snapped bleeder means the caliper or wheel cylinder comes off for drilling or replacement. This is the most common reason a simple fluid change turns into a shop visit.
- No fluid comes out: the bleeder passage is blocked with corrosion. Remove the screw completely, clear it with a thin wire, and blow it out with brake cleaner.
- The pedal is still soft: repeat the full sequence slowly. Check that every bleeder is closed, that the reservoir never dropped, and that the hose fittings are tight.
- Fluid weeping at a bleeder afterwards: nip it up a little more, but do not gorilla it. These threads strip easily.
- Squealing after the job: that is friction, not hydraulics. Our squeaky brakes guide has the usual causes.
The Pedal Test You Must Not Skip
Before the car leaves the driveway, do three things. With the engine off, pump the pedal five or six times. It should become firm and stay high. Start the engine and press again, where the pedal will drop slightly as the booster engages and then hold solid. Finally, roll forward at walking pace in a clear space and brake gently, then a little harder.
If any of that feels wrong, put the car back on stands and bleed again. Brakes are the one system where good enough is not a category.
What It Costs: DIY Versus the Shop
Doing It Yourself
- Two bottles of DOT 4 fluid: $12 to $25
- One person bleeder kit: $25 to $50, reusable forever
- Flare nut wrench set: $15 to $35
- Brake cleaner and rags: $10
- Jack and stands, if you do not own them: $80 to $200 once
- Time: one to two hours
At the Shop
- Brake fluid flush: $90 to $200 at most independents
- Dealer pricing: $150 to $250, more on European models
- ABS module bleed with a scan tool: add $60 to $150
- Seized bleeder repair: $100 to $300 per corner
- Time: about an hour, plus the trip in and out
Do it twice and the tools have paid for themselves. Do it every two years for the life of the car and the saving runs into four figures. If you are working through a wider list of jobs worth doing yourself, our guide on saving money on car repairs ranks them by difficulty and payoff.
The Bottom Line
Brake fluid is the only part of your braking system that degrades on a calendar rather than on mileage, and it is the cheapest thing on the car to renew. Two bottles, a wrench, an afternoon, and you have restored the full safety margin the engineers designed in.
Check the manual for the right rating, start at the wheel furthest from the master cylinder, never let the reservoir run dry, and test the pedal before you drive. Do that and you never have to think about boiling fluid on a mountain road again.
What to Read Next
DIY Brake Pad Replacement
The natural job to pair with a fluid change, wheels are already off
Brake Rotor Replacement
When resurfacing is not enough and the discs need renewing
Squeaky Brakes: Causes and Fixes
Work out whether that noise is dust, wear, or something worse
Best Brake Pads 2026
Ceramic, semi metallic, and truck pads compared for real use
Frequently Asked Questions
Don't Miss Critical Car Care Tips
Get exclusive guides, money-saving maintenance tips, and early warning signs delivered straight to your inbox.