DIY Brake Rotor Replacement: Complete Guide
Quick Answer
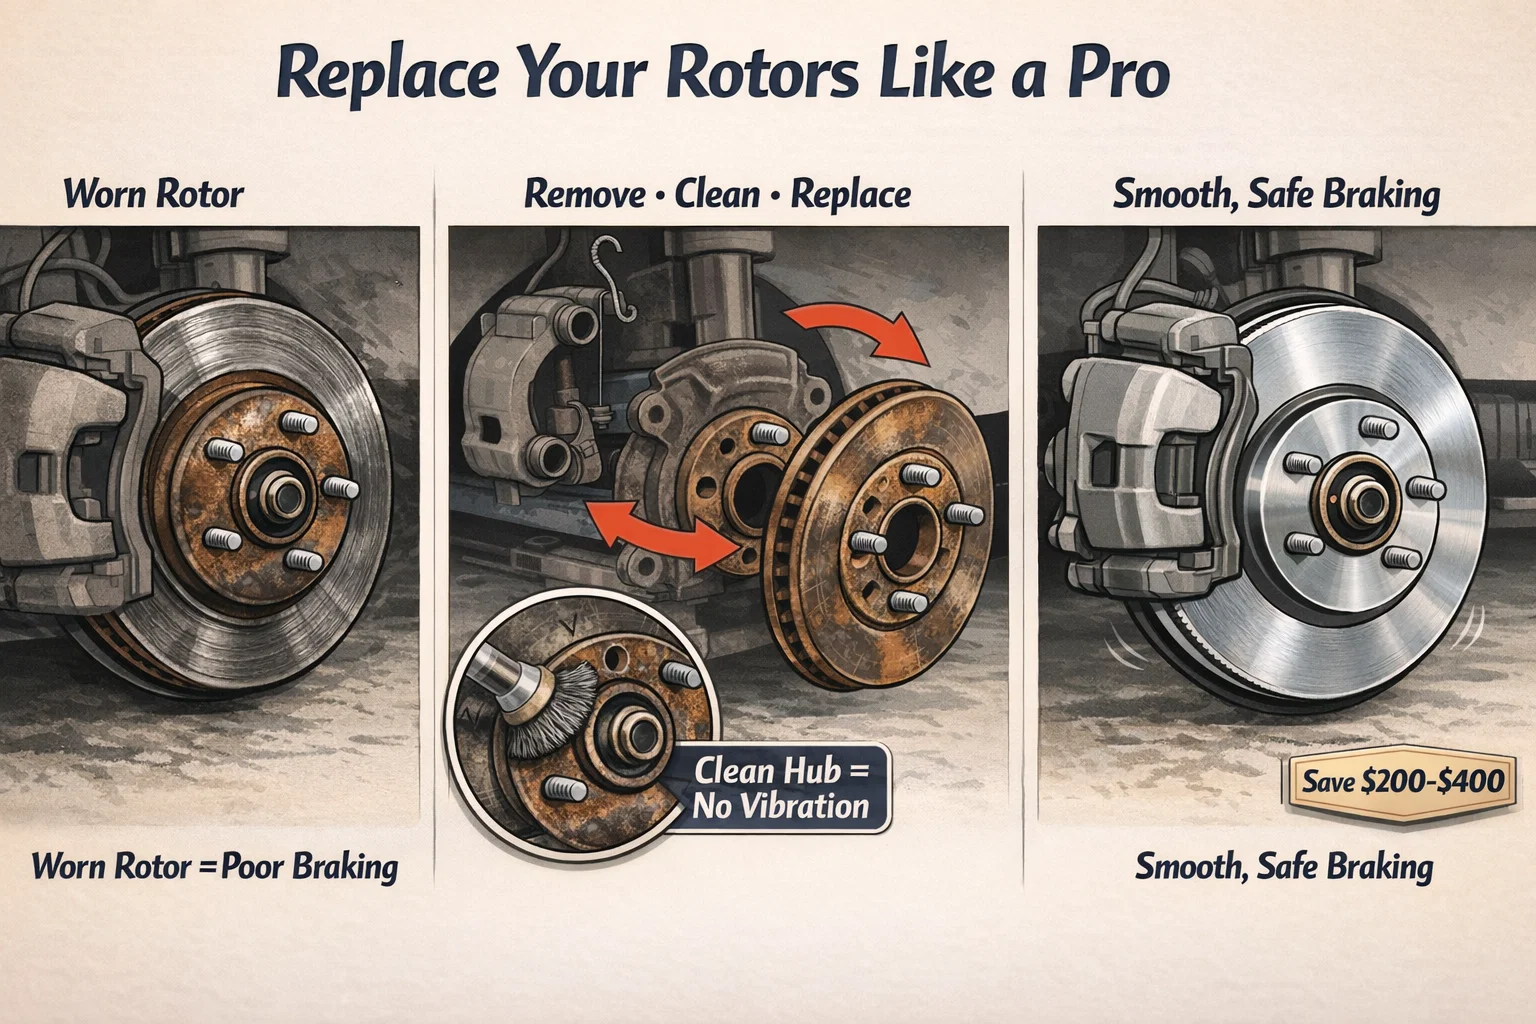
DIY brake rotor replacement costs $40 to $120 per rotor in parts and takes about 2 hours per axle. Shops charge $300 to $600 per axle. Replace rotors when they are below minimum thickness (stamped on the rotor), warped (pulsating brake pedal), or deeply grooved. Always replace pads at the same time.
The Next-Level Brake Job That Saves You Serious Money
If you have already tackled a brake pad replacement, rotors are the natural next step. Shops charge $300 to $600 per axle for a brake and rotor job. The parts alone cost $40 to $120 per rotor for most vehicles. With basic hand tools and about two hours per axle, you can do this job yourself and save $200 to $400.
Brake rotors are the flat metal discs that your brake pads clamp against to stop the car. Over time, they wear thin, develop grooves, or warp from heat. When that happens, you get pulsating brakes, grinding noises, or longer stopping distances. Replacing them restores full braking power and eliminates those symptoms.
This guide covers when rotors need replacing, how to choose the right type, and a complete step-by-step replacement process with torque specs.
Brake rotors work alongside your brake pads as part of the disc brake system. When you press the brake pedal, hydraulic pressure pushes the caliper pistons, which squeeze the brake pads against the rotor. The friction between pad and rotor converts your car's kinetic energy into heat, slowing you down. Over thousands of miles, both the pads and rotors wear. Pads wear faster, but rotors eventually need replacing too.
When Do Brake Rotors Need Replacing?
Unlike brake pads, which have visible wear indicators, rotors require measurement or inspection to determine if they are worn out. Here are the key signs:
- Pulsating brake pedal: A warped rotor creates an uneven surface that causes the pedal to pulse or vibrate when you brake. This is the most common sign of rotor problems.
- Grinding noise: If you hear metal-on-metal grinding, your pads are completely worn and the backing plate is grinding directly on the rotor. Both pads and rotors need replacement at this point.
- Visible grooves or scoring: Run your finger across the rotor face (when cool). Deep grooves indicate the rotor surface is no longer smooth enough for effective braking.
- Below minimum thickness: Every rotor has a minimum thickness specification stamped on the hub or casting. Once the rotor wears below this number, it cannot safely dissipate heat and must be replaced.
- Lateral runout: A rotor that wobbles side to side on the hub causes uneven pad wear and pulsation. This can be caused by improper torquing of lug nuts or hub corrosion.
MEASURE BEFORE YOU REPLACE
Use a micrometer to measure rotor thickness at multiple points around the disc. Compare your measurements to the minimum thickness stamped on the rotor. If the rotor is within spec and has no deep grooves, you may be able to resurface (machine) it instead of replacing it. However, new rotors are often cheaper than machining, especially for economy vehicles.
Types of Brake Rotors
Rotors come in several designs, each with different performance characteristics and price points:
| Type | Best For | Price Range | Pros / Cons |
|---|---|---|---|
| Blank (Smooth) | Daily driving, commuting | $30-80 each | Quiet, long-lasting / basic heat dissipation |
| Drilled | Wet climates, light performance | $50-120 each | Better wet braking, looks sporty / can crack under extreme heat |
| Slotted | Towing, heavy vehicles, performance | $60-140 each | Excellent heat and gas venting / wears pads faster, can be noisy |
| Drilled + Slotted | Performance street cars | $70-160 each | Best heat management / higher pad wear, more expensive |
For most daily drivers, blank (smooth) rotors from a quality brand are the best value. They are quiet, long-lasting, and more than adequate for normal braking. Save the drilled and slotted options for performance driving, towing, or mountainous terrain where brake heat is a real concern.
Tools and Parts You Will Need
🔧 Tools
- Floor jack and jack stands
- Lug wrench or impact wrench
- Socket set (metric or SAE for your vehicle)
- C-clamp or brake piston tool
- Torque wrench
- Wire brush
- Brake cleaner spray
- Anti-seize compound
📦 Parts
- New brake rotors (pair per axle)
- New brake pads (always replace with rotors)
- Brake hardware kit (anti-rattle clips)
- Brake grease (for caliper slide pins)
SAFETY FIRST
Always replace rotors in pairs (both front or both rear). Mismatched rotors cause uneven braking and can pull the car to one side. Never work under a vehicle supported only by a jack. Always use jack stands on a level surface. Allow brakes to cool completely before starting work.
Step-by-Step Rotor Replacement
This process covers replacing front rotors, which is the most common job. Rear rotors follow the same basic steps, though some vehicles with rear drum-in-hat parking brakes require additional disassembly.
Lift and Secure the Vehicle
Loosen the lug nuts while the car is on the ground (one turn only). Jack up the vehicle and place it securely on jack stands. Remove the lug nuts and wheel completely. This gives you full access to the brake assembly.
Remove the Brake Caliper
Remove the two caliper slide pin bolts (usually 12mm to 15mm). Lift the caliper off the rotor and hang it from the suspension using a wire hanger or bungee cord. Never let the caliper hang by the brake hose, as this damages the line.
Remove the Caliper Bracket
Remove the two caliper bracket bolts (usually 17mm to 19mm). These are torqued tightly, so you may need a breaker bar. Set the bracket aside with the caliper. Remove the old brake pads from the bracket.
Remove the Old Rotor
The rotor should slide off the hub studs. If it is stuck (common due to rust and corrosion), thread two bolts into the threaded holes on the rotor face and tighten evenly to push it off. Alternatively, tap the back of the rotor with a rubber mallet. Never strike with a steel hammer, as this can damage the hub or studs.
Clean the Hub Surface
Use a wire brush to clean rust and debris from the hub mounting surface. A clean, flat hub surface is critical. Any corrosion buildup between the hub and rotor causes lateral runout (wobble) that leads to pedal pulsation. Apply a thin coat of anti-seize to the hub center ring to prevent the new rotor from seizing on in the future.
Install the New Rotor
Clean the new rotor with brake cleaner to remove the protective oil coating from manufacturing. Slide it onto the hub studs. Some rotors have a directional vane pattern. If yours does, verify the vanes angle toward the rear of the vehicle for proper airflow and cooling.
Reinstall Bracket, Pads, and Caliper
Bolt the caliper bracket back on and torque to spec (typically 80 to 100 ft-lbs, check your service manual). Install the new brake pads with fresh anti-rattle clips. Compress the caliper piston using a C-clamp (open the brake fluid reservoir cap first to prevent pressure buildup). Slide the caliper over the new pads and torque the slide pin bolts to spec (typically 25 to 35 ft-lbs).
Reinstall the Wheel and Torque Lugs
Mount the wheel and hand-tighten the lug nuts in a star pattern. Lower the vehicle and torque the lug nuts to your vehicle's specification (typically 80 to 100 ft-lbs for passenger cars). Pump the brake pedal several times before driving to seat the pads against the new rotors. The pedal will feel soft until the pads make contact.
Bedding In Your New Brakes
New pads and rotors need a break-in period called "bedding" to transfer a thin layer of pad material onto the rotor surface. This creates optimal friction and prevents squealing. Follow this procedure:
- Find a quiet, straight road with no traffic behind you.
- Accelerate to 35 mph and apply moderate braking to slow to 5 mph. Do not come to a complete stop.
- Repeat this 8 to 10 times.
- Then accelerate to 55 mph and apply firm (but not emergency) braking to slow to 15 mph. Repeat 3 to 5 times.
- Drive for 5 to 10 minutes at normal speed without heavy braking to cool the rotors gradually.
AVOID FULL STOPS DURING BEDDING
Coming to a complete stop on new, hot rotors can transfer pad material unevenly, creating a high spot that causes permanent pulsation. Keep rolling during the bedding process. After the initial bedding cycle, avoid aggressive braking for the first 200 miles to let the pads fully cure.
If you have not replaced your brake pads recently, our brake pad replacement guide covers the pad-only procedure in detail. For diagnosing other brake-related symptoms, see our suspension problems guide and shocks vs struts guide.
What to Read Next
Frequently Asked Questions
Don't Miss Critical Car Care Tips
Get exclusive guides, money-saving maintenance tips, and early warning signs delivered straight to your inbox.