How to Clean a Carbon-Clogged EGR Valve (DIY Guide)
Quick Answer
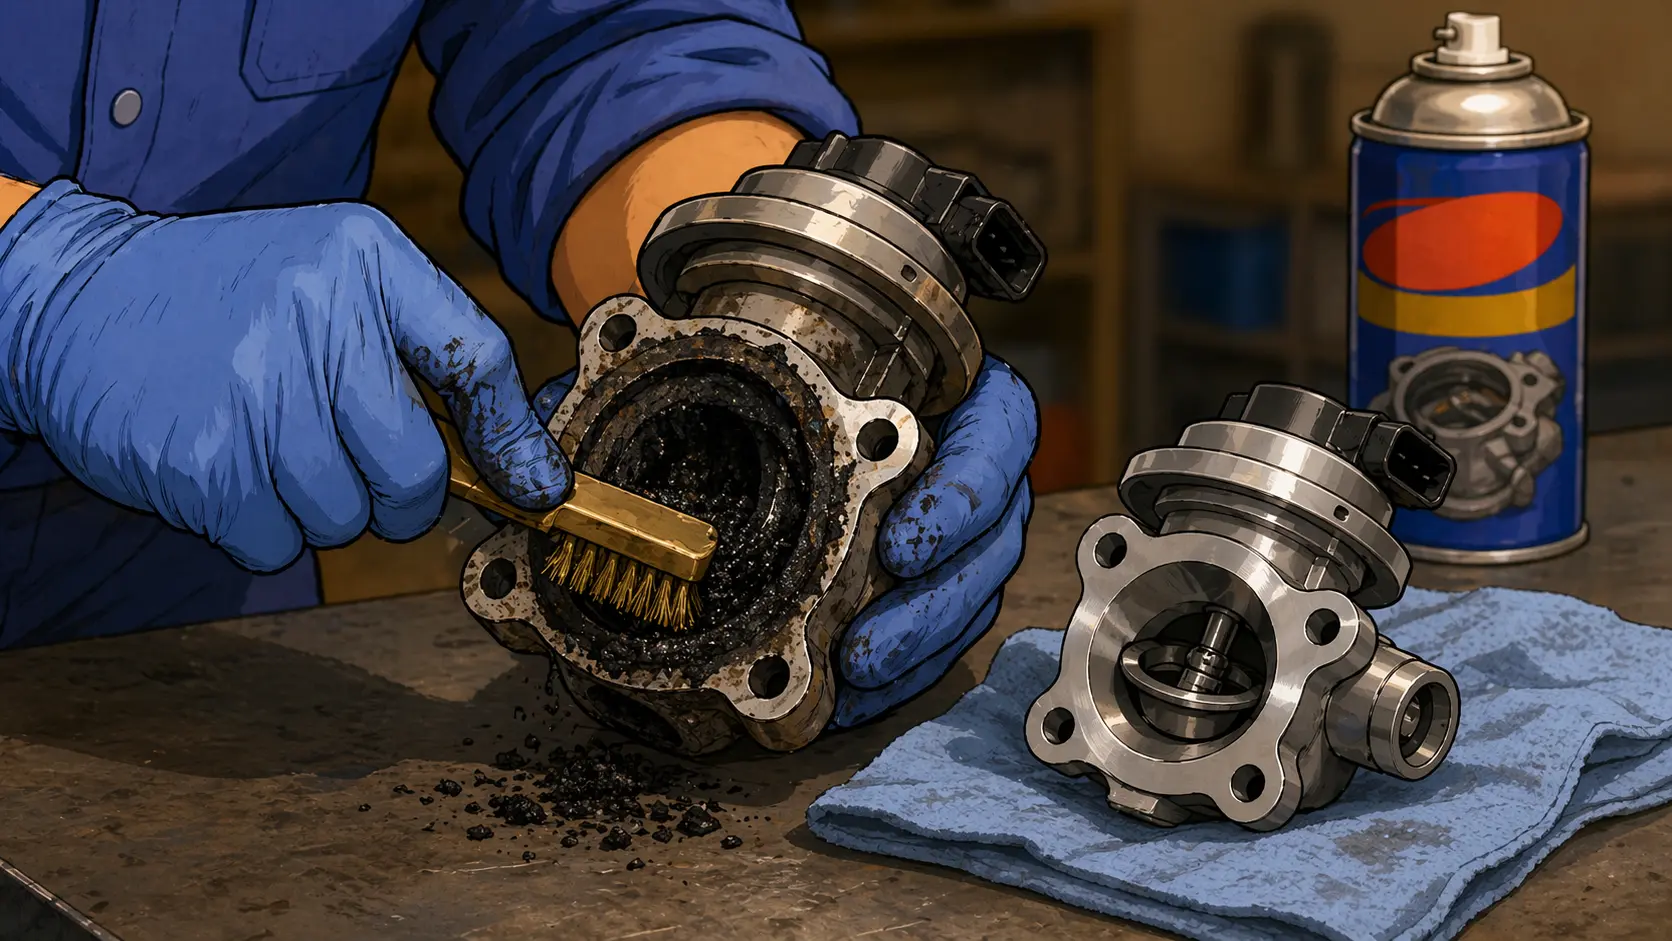
Cleaning an EGR valve takes 1 to 2 hours and costs under $20 in supplies. Disconnect the battery, unbolt the EGR valve from the intake manifold, scrub the carbon deposits off the valve and inside the ports using carb or throttle body cleaner with a brass brush, install a new gasket, and bolt it back on. Cleaning often clears P0401 and P0402 codes without buying a $200 to $400 replacement valve.
Save Hundreds Before Replacing the EGR Valve
The EGR (exhaust gas recirculation) valve cycles a small amount of exhaust back into the intake to lower combustion temperatures and reduce nitrogen oxide emissions. Over time, carbon and oily soot build up on the valve and ports, sticking the valve open or closed. The result is a check engine light, rough idle, hesitation, and codes like P0400, P0401, P0402, P0404, or P0406.
Most shops will quote you a new EGR valve, which costs $200 to $400 in parts plus $100 to $200 in labor. But on roughly half of cases, a thorough cleaning brings the existing valve back to life for under $20. This guide shows you how to identify the problem, remove the valve safely, clean it right, and decide whether you need to replace it after all.
You will learn what the EGR valve does, common failure symptoms, the tools you need, a safe step-by-step cleaning procedure, and how to know when cleaning will not save it.
A clogged EGR valve makes itself known in a few ways. The most common symptom is a check engine light with EGR-related codes (P0400 through P0408). Beyond the warning light, you may notice a rough or surging idle, hesitation when accelerating from a stop, pinging or knocking under load, increased fuel consumption, and reduced power. On older diesels, you might see black smoke under acceleration. These symptoms come from the EGR valve being stuck open, which dumps exhaust into the intake at the wrong time, or stuck closed, which prevents proper emissions control and triggers the code.
How an EGR Valve Works (and Why It Clogs)
The EGR valve opens at specific engine loads to route a small amount of exhaust gas back into the intake manifold. This dilutes the air-fuel mixture and lowers combustion temperatures, which reduces nitrogen oxide (NOx) emissions, the primary smog component regulated by the EPA.
The problem: exhaust gas carries soot, oil vapor, and unburned fuel. Over thousands of miles, this gunk bakes onto the EGR valve, the valve seat, and the surrounding intake passages. Eventually the deposit layer is thick enough to physically block the valve from closing fully or restrict flow when it opens. Short trips and stop-and-go driving accelerate the buildup because the engine never gets hot enough to burn off the deposits.
WHY YOU SHOULD CLEAN BEFORE YOU REPLACE
Many EGR valves that throw codes are mechanically fine. The actuator and electronics work, but the valve cannot move freely because of carbon. Cleaning restores function in roughly half of cases, saving you $200 to $400. Replace only if cleaning does not clear the code or if you find physical damage to the valve.
Confirm the Problem with an OBD2 Scanner
Before you tear into anything, scan for codes. EGR codes typically start with P040X. Here are the common ones:
- P0400: EGR flow malfunction (general)
- P0401: EGR insufficient flow detected (often a clogged valve or passages)
- P0402: EGR excessive flow detected (often a stuck-open valve)
- P0403: EGR control circuit malfunction (electrical fault)
- P0404: EGR control circuit range/performance
- P0406: EGR sensor "A" circuit high
If you see P0401, P0402, or P0400, cleaning is a great first step. If you see P0403 or P0406, you may have an electrical or sensor problem that cleaning will not fix. For a complete walkthrough on reading and clearing codes, see our check engine light diagnosis guide.
Tools and Supplies You Will Need
🔧 Tools
- Metric socket set (8mm to 17mm)
- Ratchet and extensions
- Brass wire brush (do not use steel)
- Old toothbrush
- Plastic gasket scraper
- Safety glasses
- Nitrile gloves
- OBD2 scanner
- Shop rags
📦 Supplies
- Carburetor or throttle body cleaner (1 can)
- EGR valve gasket (vehicle-specific)
- Anti-seize compound (small amount)
- Empty container or pan to soak parts
USE THE RIGHT CLEANER
Use only carburetor cleaner, throttle body cleaner, or a dedicated EGR cleaner. Do not use brake cleaner or carb cleaner labeled "fast-drying" on plastic or rubber parts. Many EGR valves have rubber diaphragms or plastic actuator housings that will be destroyed by the wrong solvent. Read the label and check that the cleaner is safe for plastics and seals.
Step-by-Step EGR Valve Cleaning
This procedure works for most gasoline-powered cars and light trucks with a bolted EGR valve. Diesel EGR systems often have water-cooled coolers and are significantly more involved. Consult your service manual if you have a diesel.
Disconnect the Battery
Open the hood. Disconnect the negative battery terminal with a 10mm wrench. This protects the EGR's electrical components and prevents accidental shorts when you are working near the intake manifold.
Locate the EGR Valve
The EGR valve is typically mounted on the intake manifold and connected to the exhaust manifold by a metal tube. It looks like a small round or oval-shaped metal canister with two to four bolts and an electrical connector. If you cannot spot it, search "[your year, make, model] EGR valve location" online or look at your repair manual.
Disconnect the Electrical Connector and Vacuum Lines
Press the release tab on the electrical connector and pull it straight off. If your EGR uses a vacuum line (older designs), pull it off the nipple. Take a quick photo with your phone first so you remember how everything goes back together.
Unbolt the EGR Valve
Most EGR valves have two or three bolts (often 10mm or 13mm). Soak the bolts with penetrating oil if they look corroded. Unscrew them slowly and pull the valve straight off the intake manifold. The old gasket will likely stay stuck to one side or the other.
Inspect the Carbon Buildup
Look at the underside of the valve and the port on the intake manifold. Heavy carbon buildup looks like thick black or dark brown crust. If the valve disc inside the body cannot move freely when you press it with a wood stick or screwdriver handle (do not use metal, you can damage the seat), cleaning is justified. If the disc moves but the actuator is broken or the diaphragm is torn, you need a replacement.
Clean the Valve
Spray carb cleaner generously into the valve openings. Let it soak for 5 to 10 minutes to soften the carbon. Use a brass brush and old toothbrush to scrub the deposits off. Work the valve disc back and forth (gently) with a wood dowel to free it. Spray and scrub repeatedly until the valve disc moves freely and the metal looks clean. Avoid getting cleaner on any electrical connectors or rubber parts.
Clean the Intake Manifold Port
Stuff a clean rag into the intake port to catch debris. Use a plastic gasket scraper to remove the old gasket material from the mating surface. Spray cleaner into the port and scrub with the brass brush. Pull the rag out (along with the loosened debris). Wipe the surface with a clean rag until no more black residue comes off.
Reinstall with a New Gasket
Place the new gasket on the intake port (no sealant needed unless your manual specifies). Apply a tiny dab of anti-seize on the bolt threads. Bolt the valve back into place, tightening evenly. Check your service manual for torque (typically 15 to 20 ft-lbs). Reconnect the electrical connector and any vacuum lines.
Reconnect Battery and Clear Codes
Reconnect the negative battery terminal. Plug in your OBD2 scanner and clear any stored EGR codes. Start the engine and let it idle for 5 minutes. Drive normally for 15 to 20 minutes including some highway speed to complete the EGR readiness monitor. Re-scan to confirm no codes return.
WHEN CLEANING WILL NOT SAVE IT
Replace the EGR valve (do not just clean it) if: the diaphragm or solenoid is physically damaged, the valve disc is bent or cracked, the actuator motor does not respond to commands (test with a scanner that supports actuator activation), the code returns within 100 miles of cleaning, or you have visible exhaust leaks at the EGR tube where it cannot be repaired with a new gasket.
DIY Cleaning vs. Shop Replacement
| Cost Category | DIY Clean | Shop Replace |
|---|---|---|
| EGR valve (parts) | $0 (clean existing) | $200-400 |
| Gasket and cleaner | $10-20 | Included |
| Labor | $0 (your time) | $100-200 |
| Total | $10-20 | $300-600 |
If cleaning works, you save $290 to $580. Even if cleaning does not work and you end up replacing the valve, you have already done the labor of removing it once, so the second install goes much faster. For more high-savings DIY jobs, see our guide to saving money on car repairs.
How to Prevent Future EGR Buildup
- Drive at highway speeds regularly: Sustained higher RPM helps burn off carbon deposits before they accumulate.
- Use top-tier gasoline: Premium and top-tier brand gasolines contain more detergents that reduce intake deposits.
- Change oil on schedule: Old, broken-down oil increases blow-by, which contributes to intake-side carbon buildup. Our oil change guide covers proper intervals.
- Clean the EGR every 50,000 miles: Many drivers proactively clean the valve as part of regular maintenance, well before symptoms appear.
- Avoid extended short trips: Engines that never reach full operating temperature accumulate deposits faster. If most of your driving is short, mix in a longer drive once a week.
External Resources
For more on EGR system function and emissions standards, see the EPA vehicle emissions testing reference. For deeper diagnostic guidance on reading EGR-related trouble codes, the Bosch Diagnostics resource center offers manufacturer-grade reference material from a co-inventor of the OBD standard.
What to Read Next
Frequently Asked Questions
Don't Miss Critical Car Care Tips
Get exclusive guides, money-saving maintenance tips, and early warning signs delivered straight to your inbox.