DIY Wheel Hub Assembly Replacement: Complete Guide
Quick Answer
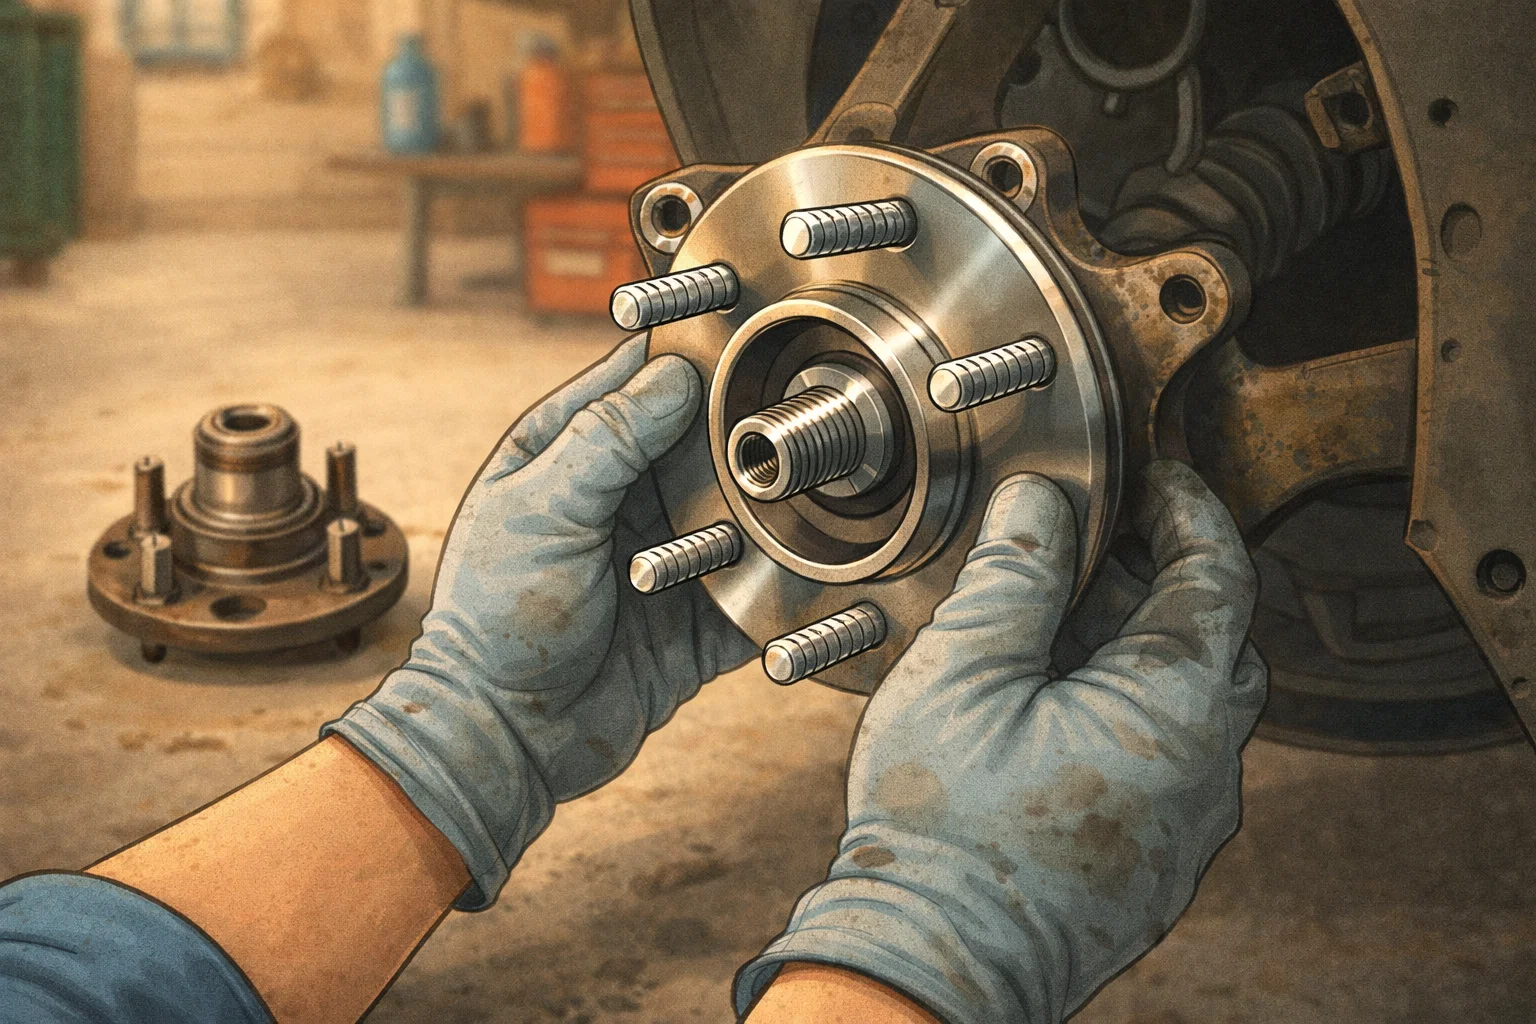
Replacing a wheel hub assembly takes 2 to 4 hours per side and costs $80 to $250 in parts. The job involves removing the wheel, brake caliper, brake rotor, and axle nut, then unbolting the old hub from the steering knuckle and bolting the new pre-pressed hub assembly in its place. On most modern cars, the bearing is sealed inside the hub, so the entire unit is replaced as one piece. A torque wrench is required to properly tighten the axle nut and hub bolts to factory specs.
From Diagnosis to a Quiet Ride in One Afternoon
A failing wheel hub assembly produces that classic humming, growling, or grinding noise that gets louder as you speed up. On most cars built in the last 20 years, the wheel bearing is sealed inside a unitized hub assembly that bolts directly to the steering knuckle. This makes replacement easier than the old-school method of pressing bearings in and out, but it also means buying the whole hub when only the bearing fails. Parts run $80 to $250 per side, while a shop charges $300 to $700 with labor.
If you have already confirmed a bad bearing using our wheel bearing diagnosis guide, this post walks you through every step of the actual replacement. You will need basic hand tools, a torque wrench, and a safe way to lift the vehicle. Plan on 2 to 4 hours for your first hub, faster on the second side.
This guide covers tools, safety prep, the full step-by-step procedure, torque specs, common mistakes, and when to leave the job to a shop.
A wheel hub assembly does two jobs at once. It holds the wheel to the car and lets it spin smoothly on a sealed bearing. When that bearing wears out, the symptoms are unmistakable: a low-pitched humming or growling noise from one corner of the car, a vibration that gets worse with speed, sloppy steering feel, and sometimes a clicking sound when turning. Ignoring it long enough leads to wheel wobble, ABS failure, and in worst cases a wheel separating from the car at speed.
Why You Replace the Whole Hub Assembly
Older cars used a tapered roller bearing that could be unpacked, regreased, and adjusted. Modern cars (1990s and newer for most front-drive vehicles, 2000s for many rear-drive) use a sealed unit bearing pressed into a single-piece hub assembly. The bearing is not separately serviceable. When it fails, you replace the entire hub.
The good news: this design is a DIY win. There is no special bearing press needed, no fragile dust seals to fight, and no preload to set. You just unbolt the old assembly and bolt in the new one. The bad news: the unit costs more than a loose bearing did, typically $80 to $250 versus $20 to $40.
CHECK YOUR HUB DESIGN FIRST
Before you order parts, confirm what type of hub you have. Search "[your year, make, model] wheel hub assembly" online. If results show a one-piece unit with bolts and an integrated ABS sensor, you have a unitized hub (this guide applies). If results show a separate bearing and pressed-in race, you have an old-style design that requires a hydraulic press and a different procedure.
Tools and Parts You Will Need
🔧 Tools
- Floor jack and jack stands (rated for vehicle weight)
- Wheel chocks
- Lug wrench or impact gun
- Breaker bar (24 inch minimum) for the axle nut
- Large socket for axle nut (typically 30mm to 36mm)
- Ratchet and metric socket set
- Torque wrench (rated to at least 200 ft-lbs)
- Penetrating oil (PB Blaster or Kroil)
- Rubber mallet or dead-blow hammer
- Bungee cord or wire to support brake caliper
- Wire brush
📦 Parts
- New wheel hub assembly (match exact part number)
- New axle nut (always replace, do not reuse)
- Anti-seize compound (for hub mounting flange)
- Brake cleaner
- Optional: new ABS sensor (if integrated and old one is corroded)
THE AXLE NUT IS NOT REUSABLE
Most factory axle nuts are single-use stretch nuts or use a crush washer. Reusing them risks the nut backing off, which causes wheel separation. Always order a new axle nut with the hub assembly. They are cheap (under $10) and non-negotiable.
Safety Prep Before You Start
- Park on level concrete: Never work on a vehicle on a slope or soft ground. Jack stands can sink or tip.
- Chock the opposite wheels: Place chocks in front of and behind the wheels you are not lifting. If you are doing the front passenger hub, chock both rear wheels.
- Loosen the axle nut and lug nuts before lifting: Both fasteners are tightened to high torque (axle nut is often 150 to 250 ft-lbs). Breaking them loose with the wheel on the ground prevents the wheel from spinning.
- Use jack stands, never the jack alone: A hydraulic jack can fail. Always support the vehicle on rated jack stands at the manufacturer's lift points.
Step-by-Step Wheel Hub Replacement
This procedure covers a typical front-wheel-drive vehicle with a unitized hub. Rear hubs are similar but skip the axle nut step (no driveshaft to deal with). Always check your specific vehicle's service manual for torque values and any model-specific quirks.
Loosen Axle Nut and Lug Nuts
With the car still on the ground, pop off the dust cap on the axle nut if equipped. Use a breaker bar and the appropriate large socket to break the axle nut loose. Do not remove it yet, just crack it free. Then loosen all five lug nuts about half a turn each.
Lift the Vehicle and Remove the Wheel
Jack the car up at the manufacturer's lift point and place a jack stand under the frame or pinch weld. Lower the car onto the jack stand. Remove the lug nuts and pull the wheel off. Set the wheel under the car as a safety backup in case the jack stand fails.
Remove the Brake Caliper and Bracket
Locate the two caliper slide bolts on the back of the caliper. Remove them and slide the caliper off the rotor. Do not let it hang by the brake hose. Use a bungee cord or wire to hang the caliper from a suspension component. Then remove the two larger caliper bracket bolts (often 17mm or 19mm) and remove the bracket. If you need a refresher on brake removal, our brake pad replacement guide walks through caliper removal in detail.
Remove the Brake Rotor
The rotor usually has a small Phillips screw or two Torx screws holding it on. Remove them, then pull the rotor straight off the hub. If it is rust-stuck, give the hub face (not the friction surface) a few firm taps with a rubber mallet. If it still will not budge, our brake rotor replacement guide covers stuck-rotor techniques.
Remove the Axle Nut and ABS Sensor
Fully remove the axle nut you cracked loose in step 1. Locate the ABS wheel speed sensor on the back of the hub. There is usually one small bolt holding it. Remove the bolt and gently pry the sensor out. Set it aside. Disconnect the ABS sensor wiring harness clip from any nearby brackets so it can move freely.
Push the Axle Out of the Hub
The CV axle splines pass through the hub. Push the axle inward (toward the center of the car) so it clears the hub. A few light taps with a rubber mallet on the end of the axle stud usually does it. If it is corroded in place, spray penetrating oil and let it sit for 10 minutes. Do not hammer hard with a steel hammer or you can damage the threads. For more on CV axles, see our CV axle replacement guide.
Unbolt the Old Hub Assembly
Look behind the steering knuckle. You will see three or four bolts holding the hub flange to the knuckle. These are usually 14mm to 18mm. Spray them with penetrating oil first. Use a breaker bar to break them loose. Once all bolts are out, the hub should pull off the knuckle. Stubborn hubs may need a few firm taps with a dead-blow hammer on the back of the hub flange.
Clean the Knuckle Mating Surface
This step matters. Use a wire brush to clean rust and old anti-seize off the steering knuckle mating surface. The new hub must seat flat. Any debris causes uneven loading and vibration. Wipe the surface with brake cleaner. Apply a thin coat of anti-seize to the mating surface (not the bolts, just the surface) to prevent corrosion lock for the next replacement.
Install the New Hub Assembly
Slide the new hub onto the knuckle, lining up the bolt holes. Start the bolts by hand to avoid cross-threading. Then snug them down evenly in a star pattern. Torque to factory spec, typically 70 to 110 ft-lbs (check your service manual). Reinstall the ABS sensor and reconnect the harness.
Reinstall Axle, Brakes, and Wheel
Slide the CV axle splines back through the hub. Install the new axle nut by hand. Reinstall the brake rotor, then the caliper bracket (torque 70 to 100 ft-lbs typical), then the caliper itself (slide bolts 25 to 35 ft-lbs typical). Put the wheel back on and start the lug nuts by hand.
Lower and Final Torque
Lower the car so the wheel touches the ground but is not bearing full weight. Torque the axle nut to factory spec (typically 150 to 250 ft-lbs, check your manual). Then lower fully. Torque the lug nuts in a star pattern to factory spec (usually 80 to 110 ft-lbs for passenger cars). Test drive at low speed first, then highway speed. The humming should be gone.
WHEN TO STOP AND CALL A PRO
If you cannot break the axle nut loose with a 24-inch breaker bar and your full body weight, stop. The nut is likely seized. A shop has impact guns and heat that can free it without breaking the axle. Forcing it risks snapping the axle stud, which turns a $200 job into a $700 one. Also stop if the hub bolts will not come out after penetrating oil and heat. A snapped bolt in the steering knuckle is a major repair.
DIY vs. Shop Cost Comparison
| Cost Category | DIY | Shop |
|---|---|---|
| Wheel hub assembly (per side) | $80-250 | $120-350 |
| New axle nut | $5-15 | Included |
| Labor (per side) | $0 (your time) | $180-350 |
| Total per side | $85-265 | $300-700 |
For a typical front-wheel-drive sedan, expect to save $200 to $450 per side. If you have a bad bearing on both sides, doing both at once doubles the savings without doubling the time, since you already have everything torn down once. For more savings strategies, see our guide to saving money on car repairs.
External Resources
For factory torque specifications and service procedures, refer to your vehicle's service manual. The NHTSA tire and wheel safety guidelines also cover important wheel attachment and inspection standards. For a consumer-friendly explainer on wheel bearing function, warning signs, and when to inspect, the Timken engineered bearings reference is a solid supplemental resource.
What to Read Next
Wheel Bearing Diagnosis Guide
Identify which corner is making that humming noise
Brake Rotor Replacement
Often paired with hub work, save another labor charge
CV Axle Replacement
Knock out a CV axle while you have everything apart
Suspension Problems Guide
Diagnose other clunks and noises while you are under there
Frequently Asked Questions
Don't Miss Critical Car Care Tips
Get exclusive guides, money-saving maintenance tips, and early warning signs delivered straight to your inbox.