How to Rotate Your Tires: Save Money and Extend Tire Life
Quick Answer
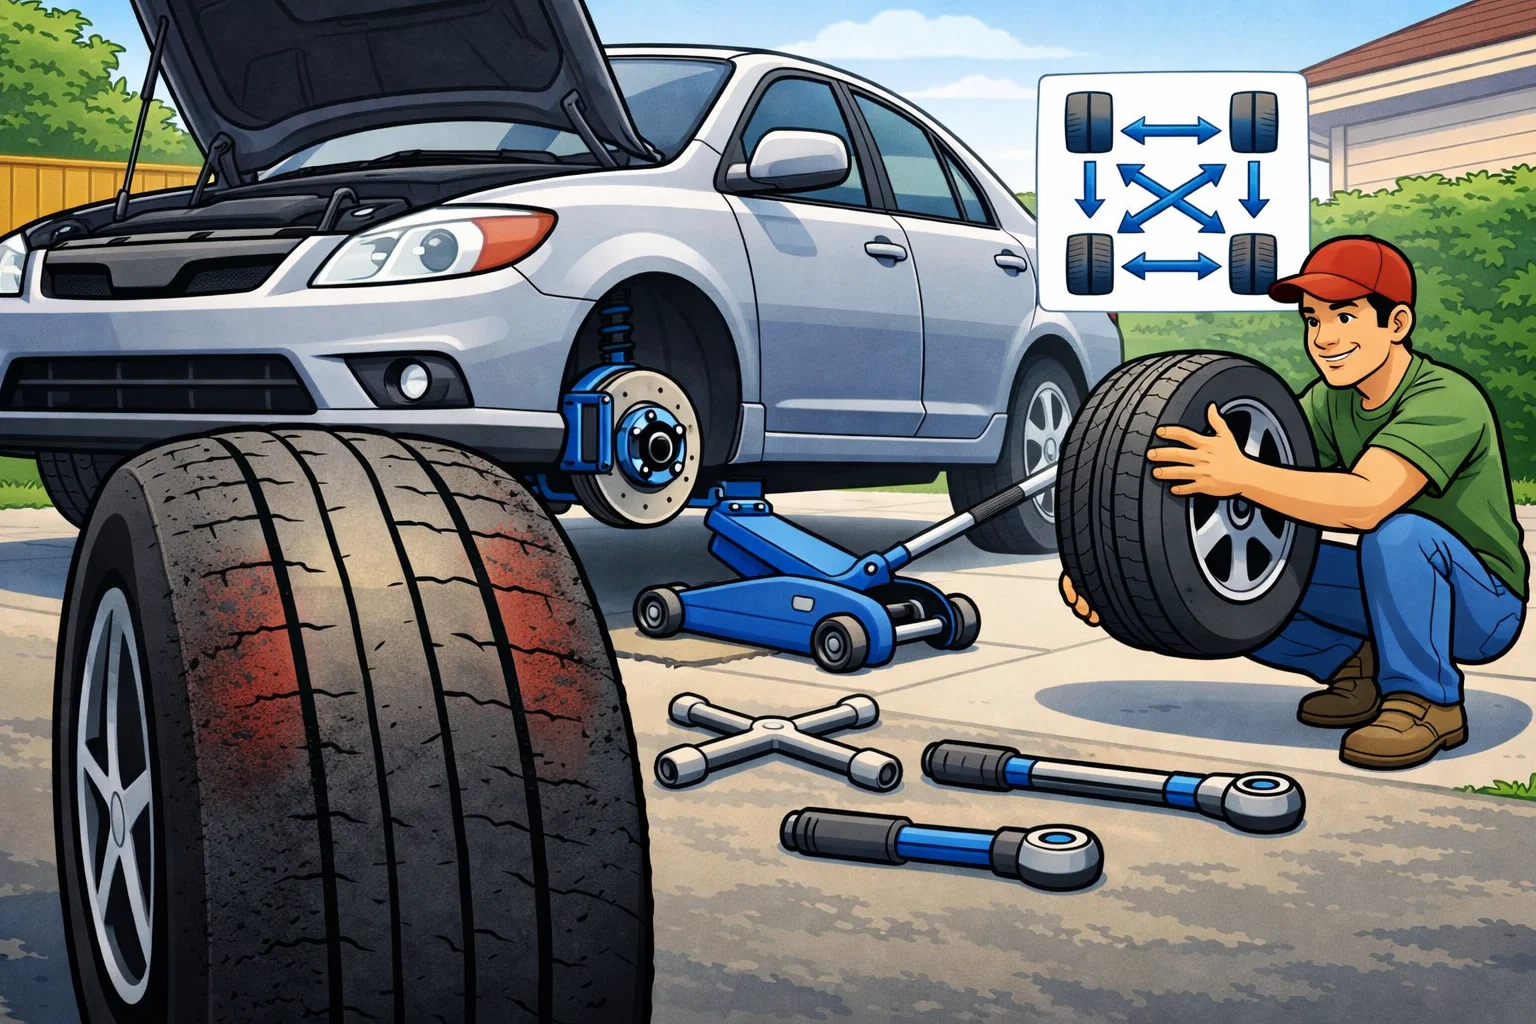
Rotate tires every 5,000 to 8,000 miles (or with every oil change). For front-wheel drive, move fronts straight to rear and cross the rears to front. For rear-wheel drive, reverse the pattern. DIY rotation takes 30 to 45 minutes with a jack and lug wrench. This extends tire life by up to 20%, saving $120+ on your next set.
Tire rotation is one of the simplest and most overlooked maintenance tasks. Shops charge $30 to $60 for something that takes 30 to 45 minutes with basic tools. More importantly, regular rotation extends tire life by up to 20%, which means getting an extra 10,000 to 15,000 miles from a $600+ set of tires. This guide covers the correct rotation pattern for every drivetrain type, proper lug nut torque, and the signs that tell you rotation is overdue.
Why Tire Rotation Matters More Than You Think
Your tires do not wear evenly. Front tires on a front-wheel-drive vehicle handle steering, acceleration, and most of the braking force. That triple workload grinds them down 2 to 3 times faster than the rears. Without rotation, you end up replacing two tires at 25,000 miles while the other two still have half their life left.
Regular rotation spreads that wear across all four tires, which means you replace all four at the same time and get maximum life from each one. On a $600 to $800 set of tires, that translates to an extra 10,000 to 15,000 miles of use. Over the life of a vehicle, rotation saves you hundreds of dollars in premature tire purchases.
The Math on Rotation
When to Rotate: The Right Interval
The standard recommendation is every 5,000 to 8,000 miles. The easiest way to remember is to rotate your tires at every other oil change. If you follow a 5,000-mile oil change interval, rotate at 5,000 and 15,000 miles, skip 10,000 and 20,000. For a complete schedule, see our car maintenance schedule by mileage.
AWD vehicles often need more frequent rotation (every 3,000 to 5,000 miles) because mismatched tread depths can damage the transfer case. Check your owner's manual for the manufacturer's specific interval.
Signs Your Tires Need Rotation Now
Uneven Tread Wear
Run your hand across the tread surface. If one side feels smoother or lower than the other, rotation is overdue. Shoulder wear on front tires is especially common on FWD vehicles. Uneven wear can also signal suspension problems that need attention.
Vehicle Pulling to One Side
If your car drifts left or right on a flat road, uneven tire wear may be the cause. Rotation can sometimes resolve mild pulling, though persistent pulling suggests an alignment issue. Our wheel alignment cost guide explains when you truly need one.
Vibration at Highway Speeds
Tires with uneven wear develop balance issues that cause steering wheel or seat vibration above 55 mph. This can also relate to worn shocks or struts.
Noticeable Tread Depth Difference
Use a tread depth gauge or the penny test (insert a penny with Lincoln's head down; if you can see the top of his head, the tread is below 2/32 inch). If front tires measure 4/32" while rears measure 7/32", rotation is overdue.
Rotation Patterns: Match Your Drivetrain
Using the wrong rotation pattern defeats the purpose. The pattern depends on your drivetrain type and whether your tires are directional or non-directional. Here are the correct patterns:
Front-Wheel Drive (FWD): Forward Cross
BEFORE → AFTER
Front Left → Rear Right
Front Right → Rear Left
Rear Left → Front Left
Rear Right → Front Right
Front tires move straight back. Rear tires cross to the opposite front position.
Rear-Wheel Drive (RWD): Rearward Cross
BEFORE → AFTER
Front Left → Rear Left
Front Right → Rear Right
Rear Left → Front Right
Rear Right → Front Left
Rear tires move straight forward. Front tires cross to the opposite rear position. Also used for 4WD vehicles.
All-Wheel Drive (AWD): X-Pattern
BEFORE → AFTER
Front Left → Rear Right
Front Right → Rear Left
Rear Left → Front Right
Rear Right → Front Left
Every tire crosses to the diagonal position. Check your manual first, as some AWD systems specify a different pattern.
Directional Tires: Front-to-Back Only
BEFORE → AFTER
Front Left → Rear Left
Front Right → Rear Right
Rear Left → Front Left
Rear Right → Front Right
Directional tires have arrows on the sidewall showing the required rotation direction. They can only swap front-to-back on the same side.
Staggered Fitment: Limited or No Rotation
If your front and rear tires are different sizes (common on sports cars and some luxury vehicles), standard rotation is not possible. If all four tires are the same size but the wheels are different widths, side-to-side swaps may work. Consult your dealer or tire shop for vehicle-specific guidance.
How to Check for Directional Tires
Step-by-Step Tire Rotation
This process takes 30 to 45 minutes once you are comfortable with it. The safest method involves lifting all four corners, but you can also work with one axle at a time if you only have one pair of jack stands.
Identify Your Tire Type and Pattern
- Check your tire sidewalls for directional arrows or "ROTATION" markings
- Confirm your drivetrain type (FWD, RWD, AWD) from the owner's manual
- Select the correct rotation pattern from the guide above
- Optional: mark each tire's current position with chalk (FL, FR, RL, RR) so you can verify the swap
Loosen Lug Nuts and Lift the Vehicle
- Park on level ground, engage parking brake, and place wheel chocks behind the tires staying on the ground
- Loosen all lug nuts 1/4 turn while the vehicle's weight holds the wheels in place
- Lift one axle at a time and place jack stands under the manufacturer's recommended jacking points
- Repeat for the second axle (if lifting all four corners)
Safety First
Remove and Swap Tires
- Remove all lug nuts and pull each wheel off its hub
- Move each tire to its new position according to your rotation pattern
- If working with one axle at a time, use the spare tire well or a clear floor area as staging
- Mount each tire onto its new hub and hand-thread lug nuts
Torque Lug Nuts to Specification
- Tighten lug nuts in a star (criss-cross) pattern, not in a circle. This ensures even seating.
- Make two passes: first to snug, then to final torque with a torque wrench
- Common torque specs: most sedans 80-100 ft-lbs, trucks/SUVs 100-140 ft-lbs
- Check your owner's manual or door jamb sticker for the exact specification
Over-Torquing Warning
Set Tire Pressure and Reset TPMS
- Check all four tires with a pressure gauge
- Inflate to the pressure listed on the driver's door jamb sticker (not the tire sidewall, which shows the maximum)
- If your vehicle has a TPMS reset button or procedure, perform it now
- Lower the vehicle, and after driving 50 to 100 miles, re-torque all lug nuts
What to Inspect While Tires Are Off
Since you already have the wheels off, take a few extra minutes to check these components. Catching problems early can save you from expensive repairs later:
- •Brake pad thickness: Look through the caliper openings. Pads under 3mm need replacement soon. See our brake pad replacement guide for details.
- •Rotor condition: Check for deep grooves, cracks, or blue heat spots on the rotor surface.
- •Suspension components: Look for leaking shocks, torn CV boots, loose tie rod ends, and cracked bushings. Our suspension diagnosis guide explains what to look for.
- •Tire sidewalls: Check for bulges, cracks, or cuts that indicate internal damage.
- •Wheel studs: Look for stretched, damaged, or missing studs. Replace before reinstalling.
Rotation + Brake Check Combo
Understanding Tire Wear Patterns
How your tires wear tells you a lot about your vehicle's condition. Here are the most common patterns and what they mean:
| Wear Pattern | Location | Likely Cause | Fix |
|---|---|---|---|
| Center wear | Middle of tread | Over-inflation | Reduce to door jamb spec |
| Edge wear (both sides) | Outer shoulders | Under-inflation | Inflate to door jamb spec |
| One-side wear | Inner or outer edge only | Alignment issue (camber) | Get alignment check |
| Cupping/scalloping | Random dips in tread | Worn shocks or struts | Replace shocks/struts |
| Feathering | Diagonal across tread | Toe alignment issue | Get alignment check |
If you spot any of these patterns, fix the underlying cause before rotating. Rotating tires that have alignment-caused wear just moves the problem to different positions without solving it. For more on tire safety standards, refer to the NHTSA tire safety guidelines.
Tire Rotation and Your Maintenance Schedule
Tire rotation fits into a broader maintenance rhythm. Here is how it connects with other services:
- • Every 5,000 miles: Oil change + tire rotation (perfect pairing). See our oil change guide.
- • Every 15,000 miles: Rotation + brake inspection + air filter check.
- • Every 30,000 miles: Consider alignment check alongside rotation.
- • Seasonally: Rotate when swapping between summer and winter tires. See our winter car prep guide and spring maintenance checklist.
Rotation only helps if the tires still have tread to save. Check yours with our tire tread depth guide before your next rotation, and read the wear pattern while the wheels are off.
Build the Habit
Frequently Asked Questions
Don't Miss Critical Car Care Tips
Get exclusive guides, money-saving maintenance tips, and early warning signs delivered straight to your inbox.