How to Remove Scratches from Your Car: A Complete DIY Guide
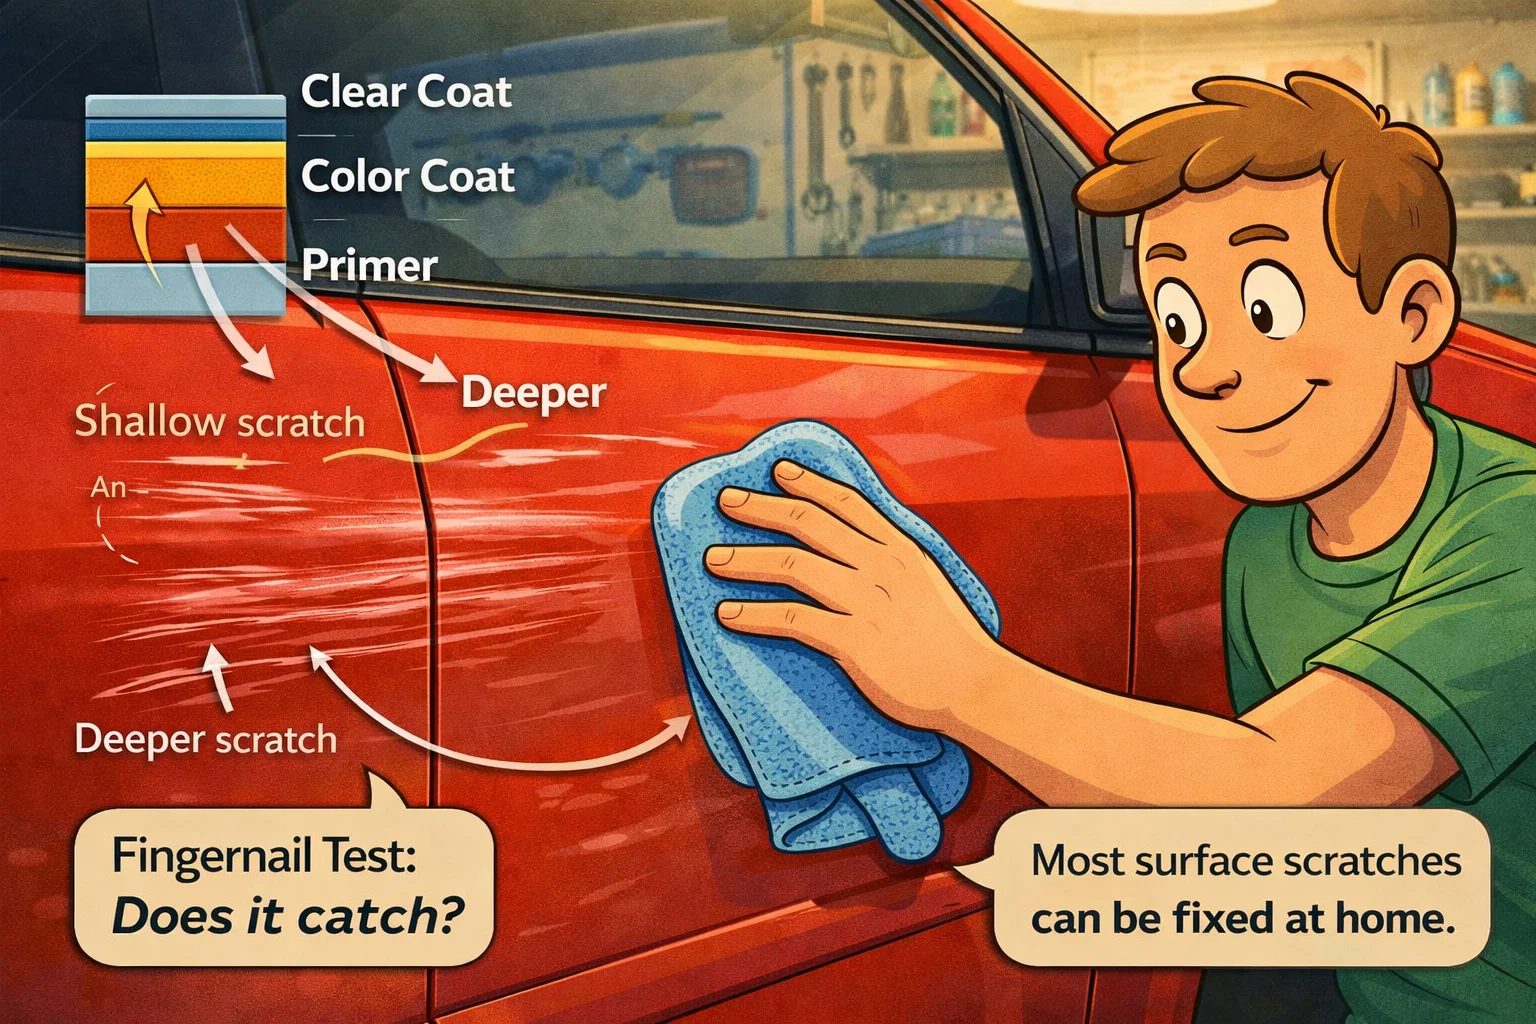
Most surface scratches can be removed at home with the right technique and a few affordable products.
Quick Answer
Run your fingernail across the scratch. If it doesn't catch, it's a clear coat scratch fixable with polish ($10 to $15). If it catches slightly, use rubbing compound then polish ($20 to $30). If it catches deeply and shows primer or metal, you need touch-up paint or professional repair. About 80% of everyday scratches are clear coat level and DIY-fixable.
Not all car scratches are created equal. Some disappear with a quick polish. Others cut through to bare metal and need a multi-step repair. The trick is knowing which type you're dealing with before you pick up a product, because the wrong approach can make things worse.
Your car's paint is built in layers: a primer coat, a color coat, and a clear coat on top. A scratch's depth determines your repair strategy. Clear coat scratches respond to polish alone. Paint layer scratches need compound and color touch-up. Deep primer scratches require a full repaint of the affected panel.
Professional scratch repair runs anywhere from $150 for a minor scuff to $1,000 or more for deep panel work. The good news? About 80% of everyday scratches sit in the clear coat and can be fixed at home for under $30 in materials. This guide covers all three scratch depths with specific methods for each, so you can handle the easy wins yourself and know exactly when to call a professional.
Grab a microfiber cloth and good lighting. Let's figure out what you're working with and get that paint looking factory fresh again.
How to Identify Your Scratch Type
Before you buy a single product, run the fingernail test. Drag your fingernail across the scratch at a 90-degree angle. If your nail glides over without catching, you're dealing with a clear coat scratch. If it catches slightly, the scratch has reached the color layer. If it catches deeply and you can see a different color underneath, it has reached the primer or bare metal.
Level 1: Clear Coat
- Fingernail does not catch
- Visible only in certain light angles
- White or hazy appearance
- Fix: Polish or rubbing compound
Level 2: Paint Layer
- Fingernail catches slightly
- Different color visible in scratch
- Wider than a hair
- Fix: Compound + touch-up paint
Level 3: Primer/Metal
- Deep catch with fingernail
- Gray primer or bare metal visible
- May have rough edges
- Fix: Full repaint or professional repair
Water Test Shortcut
Tools and Materials You'll Need
The right products depend on scratch depth. Here's what to have on hand for each level. Most of these items are available at any auto parts store for under $30 total.
Clear Coat Scratch Kit
- Scratch removal polish (Meguiar's ScratchX or similar)
- Microfiber towels (at least 3)
- Dual-action polisher (optional but faster)
- Spray bottle with water
- Isopropyl alcohol (for final cleaning)
Paint Layer Scratch Kit
- Everything in the clear coat kit, plus:
- 2000-3000 grit wet sandpaper
- Rubbing compound (3M or Meguiar's)
- Color-matched touch-up paint pen
- Clear coat pen or spray
- Masking tape
Fixing Clear Coat Scratches (Level 1)
Clear coat scratches are the most common type and the easiest to fix. This is the same method that detailers charge $50 to $150 for, and you can do it in about 20 minutes. The process works by gently removing a microscopic layer of clear coat around the scratch, leveling the surface.
Wash and Dry the Area
Clean the scratched area thoroughly with car wash soap and water. Any dirt or debris left on the surface will create new scratches when you start polishing. Dry completely with a clean microfiber towel.
Apply Scratch Removal Polish
Apply a dime-sized amount of scratch removal polish to a clean microfiber towel or polishing pad. Work the product into the scratch using firm, circular motions for about 60 seconds. The polish contains fine abrasives that level the clear coat around the scratch.
Buff and Inspect
Wipe away the residue with a clean microfiber towel. Inspect the scratch from multiple angles under good lighting. Repeat the polishing step up to three more times if the scratch is still visible. Most clear coat scratches disappear within 2 to 3 applications.
Protect the Repaired Area
Once the scratch is gone, apply a coat of wax or paint sealant to protect the freshly polished area. This restores the UV protection you removed during polishing and prevents the repair from fading.
Fixing Paint Layer Scratches (Level 2)
Paint layer scratches need more work, but they're still within DIY territory. The goal here is to fill the scratch with color-matched paint, then blend it into the surrounding finish. Professional body shops charge $200 to $500 for this repair.
Temperature Matters
Clean and Prep the Scratch
Wash the area, then wipe it down with isopropyl alcohol to remove any wax or contaminants. Use masking tape to protect the paint around the scratch, leaving only the damaged area exposed.
Wet Sand the Scratch Edges
Soak 2000-grit sandpaper in water for 10 minutes. Gently sand the scratch and surrounding area with light, even pressure. This smooths any raised edges and creates a surface the touch-up paint can bond to. Keep the sandpaper wet at all times.
Apply Touch-Up Paint
Shake the touch-up paint pen thoroughly. Apply thin layers of paint inside the scratch, building up color gradually. It's better to apply 3 to 4 thin coats with 10-minute drying times between each than one thick coat. The paint should sit slightly above the surrounding surface.
Apply Clear Coat and Blend
After the touch-up paint dries for at least 24 hours, apply clear coat over the repair. Once the clear coat cures (another 24 hours), wet sand with 2500-grit paper, then polish with rubbing compound to blend the repair into the surrounding paint. Finish with wax for protection. If you've worked on plastic components like bumper covers, our guide to painting plastic car parts covers the specific adhesion techniques you'll need.
When Scratches Go Too Deep (Level 3)
If you can see gray primer or bare metal, the scratch has gone through all paint layers. These require professional body shop attention for a lasting repair. However, you can apply a temporary fix to prevent rust while you arrange professional work.
Professional Repair Cost Guide
Small area (< 3 inches)
$150 to $300
Medium area (3 to 8 inches)
$300 to $600
Full panel respray
$500 to $1,000+
Keyed or vandal damage
$500 to $2,500+
Preventing Future Scratches
An ounce of prevention is worth a pound of rubbing compound. These habits will keep your paint looking clean and scratch-free for years.
Wash Properly
Use the two-bucket method and a quality wash mitt. Automatic car washes with spinning brushes are the number one cause of swirl marks.
Wax Every 3 Months
A quality wax or ceramic coating creates a sacrificial layer that absorbs minor scratches before they reach the clear coat.
Park Smart
Choose end spots in parking lots when possible. Door dings from adjacent cars are one of the most common sources of paint damage.
Consider Paint Protection Film
PPF on high-impact areas like the hood, fenders, and mirrors provides physical barrier protection against rock chips and scratches.
Keeping your car's exterior in great shape is just one part of overall vehicle care. If you're upgrading or replacing exterior lighting too, check out our headlight bulb replacement guide for tips on keeping your front end looking sharp and performing safely.
What to Read Next
Frequently Asked Questions: Removing Car Scratches
Don't Miss Critical Car Care Tips
Get exclusive guides, money-saving maintenance tips, and early warning signs delivered straight to your inbox.